
Cute and EASY Cuff TWO Ways!

Remember when I got free stuff from
?
I already showed you what I did with my mesh tubing when I made
..
These are more items that I chose with my dollars...
I didn't know what I'd do with them at the time, but I like them, so I assumed I'd figure it out!

The cuff featured above was actually my second try at this, and I liked it better so I'll start with this one, then show you my first go at it.
I began with this ready made ruffle I got on clearance at Michaels. It has ends that are prepped for fixtures already.

I cut this piece in half.
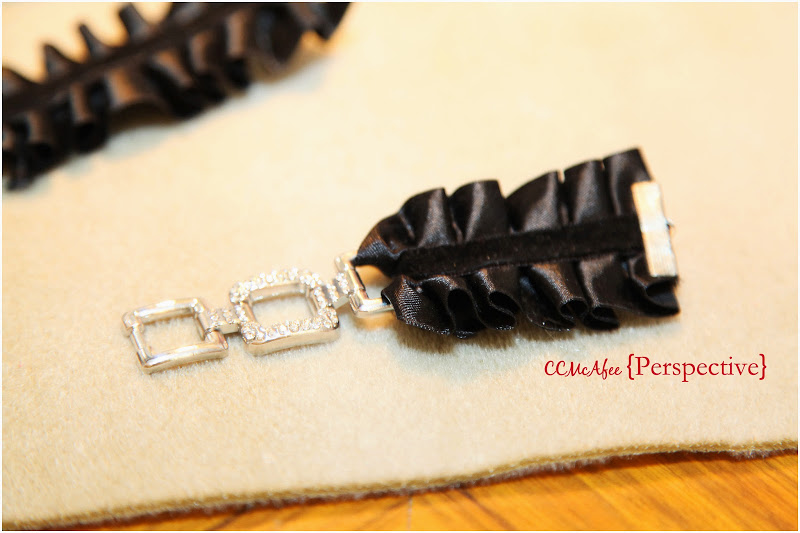
I wrapped it around one of the square ends, folded it over.

I used hot glue to hold it down.
I did burn the edges of each side so they don't continue to fray.
I repeated that for the other side.

My next step was to put ends on.
Like I said there were already ribbon clamps on the ends of this ribbon.

I used a jump ring on each end to attach the toggle clasp to the ribbon end.

Below you can see me attaching to the ribbon end.

Here it is. Super cute right?

Super easy right? You should totally make one!

Ok version 2 is super easy also.
Have you seen these faux leather straps? They are like a watch band, without the watch! You can put jewelry letters on them.
I cut two apart for this bracelet.

You can see how I folded it over, then glued it with hot glue.

Instead of folding it over just a little (like the ribbon cuff), I folded it over the whole length of the leather.

I did that on both sides. Just be careful to make sure you have a side with holes and a side with the metal.


Here it is finished.
I don't prefer this one, because I don't like the extra end all floppy.
If I were to do it again I'd include a little piece of leather strap to hold the excess down.
Does that make sense? You know how watches have that little piece you tuck the band into, so it doesn't flop around?
That is what I'm trying to describe!


Both are cute... which do you prefer?